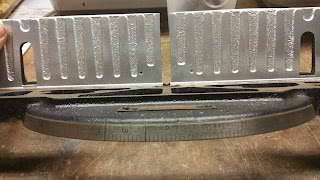
I always thought (naively, I am beginning to suspect) that as a woodworker, I would while away my free hours making wood shavings and dust. And also, sweeping up said byproducts. As I began the transition into hand tool woodworking, I quickly realized the error of that thought process. Many of the tools I need, or will need, are currently produced and available from contemporary manufacturers.
However, they are either shoddy imitations of the vintage tools they approximate, or priced beyond a point that I feel comfortable with. I don't really want to explain to the children that they won't be able to go to college, but wow do I have a great shop.
So, I have begun seeking out vintage tools that require a little love, shall we say. Along the way, I have had to do a lot of research, reading, and experimenting. And all of these have led to acquiring new skills and a new comfort level with metal work (other than the historic sheet metal work I need to get back to soon). And no project has been as challenging as the Stanley 246 mitre box that is currently in the center of my bench.
 |
| Once more, fresh from Craigslist. |
Certainly, when I first brought it home, it didn't turn any heads. except for the children maybe, but then only because they had seen Roy Underhill use one. The paint was badly worn, numerous blooms of rust, some more than just on the surface, and several missing parts. Thank God for the internet and the knowledgeable woodworkers and tool collectors who generously share their information.
Step one of course was dis-assembly and assessment. I could have gotten away with a very serious cleaning and put it back to work. But why make things so simple? Besides, if I have to take a tool apart to clean it, I may as well do the best restoration that my skills allow. Our shops and our tools say a lot about us as craftsmen, and several decades from now when I am finished, I would like mine to speak of a conscientious workman who made the most of what he was given.
So as the Saturday morning of a long weekend dawned, I began the cleaning and stripping of the larger parts (many of the smaller parts were de-rusted and cleaned nights last week).
 |
| Smaller parts undergoing rust removal. |
 |
| More of the same. |
In removing the rust, grime, and at least two layers of paint from the main frame and legs, I was presented with a surprise. Apparently, a past owner had done some minimal embellishments. There was evidence of some red detail painting on some of the parts. Never one to refuse the opportunity to milk a project, I decided the tool deserved to return to its prior glory, and added a step.
 |
| This scale wasn't even recognizable when I brought the box home. |
 |
| The frame repainted and part one reinstalled, the Stanley plate. |
 |
| Repainted. It wasn't much, but I really liked the contrast of colors. |
After repainting and my brief foray into tool decoration, I began the reassembly. I should have taken better pictures prior to taking the whole thing apart, but a few minutes of trial and error and I had the basic assembly back together.
Realizing that my Labor Day free time was coming to an end, I stopped there to clean up and took a little time to lay out the new wooden deck. I used half inch oak and cut the shape. Then off to my trash can for some ammonia fuming. Not thinking, I didn't cut the dadoes prior to fuming, so I may be repeating that process. I'll at least have the photos of the fumed board soon.
 |
| Glamour shot number one. |
 |
| And another. |
Realizing that my Labor Day free time was coming to an end, I stopped there to clean up and took a little time to lay out the new wooden deck. I used half inch oak and cut the shape. Then off to my trash can for some ammonia fuming. Not thinking, I didn't cut the dadoes prior to fuming, so I may be repeating that process. I'll at least have the photos of the fumed board soon.
This day in (Mostly American) History:
1664 New Amsterdam renamed New York under British rule
1941 Siege of Leningrad begins
1943 Italian surrender anounced during WWII
1945 American troops partition Korea
1974 President Ford pardons Richard Nixon
1998 Mark McGwire "passes" Roger Maris with his 62nd Home Run*
1664 New Amsterdam renamed New York under British rule
1941 Siege of Leningrad begins
1943 Italian surrender anounced during WWII
1945 American troops partition Korea
1974 President Ford pardons Richard Nixon
1998 Mark McGwire "passes" Roger Maris with his 62nd Home Run*

Looks real sweet so far. I have a Stanley 358(?) that I restored but it's too big to put up on the bench to use and then stow again. I've gone back to rough cutting my miters and getting them spot on with a shooting board.
ReplyDeleteStarting to look real good, you should end up with a nice tool once finished. I own three and used them and also finish my cuts on the shooting board whenever required.
ReplyDelete